Tinkercad Activity 1.1 - Make a Name Tag
What we are making today:
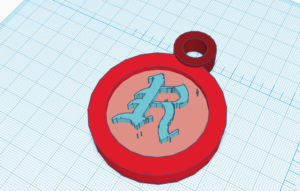
Today what we are making is a circular name tag. On top you will place an image which represents you. On bottom you will add your initials. In addition to this you will add a loop at the top to attach the tag to any object


Step One: Draw your Picture
- To begin, start by thinking up a symbol or drawing that could represent you. It could be a smiley face, lightning bolt, animal, letter, or anything else
- Check to make sure what you chose works – Can it be turned into black and white? Will it have any thin sections? If it does try to find another idea
- Now sketch out your image – feel free to begin in pencil and then use marker, but be sure that it is drawn over with a dark marker.
- Keep in mind what is dark is what will be raised
- Take a second to check your drawing – are any lines on it thin, they should all be somewhat thick, so go over any thin lines a second time to make them wider
- Make sure there are no extra marks on the page
Step Two: From Drawing to Computer
- Right now we just have a drawing – we need to get it onto a computer, the first step to do this is to take a picture on a phone
- Once you have a picture, email it to your own email. Here you should be able to download the image onto your computer
- Right now our image is in a form called a “png”, meaning it is a bunch of pixels, but in order to put it in 3D we need it to be made up of a bunch of lines, we need to make it what is called an “svg”
- to do this, visit https://www.adobe.com/express/feature/image/convert/png-to-svg and sign in with your school email
- Here you can select upload image and on the page you should be able to select your image file and upload it
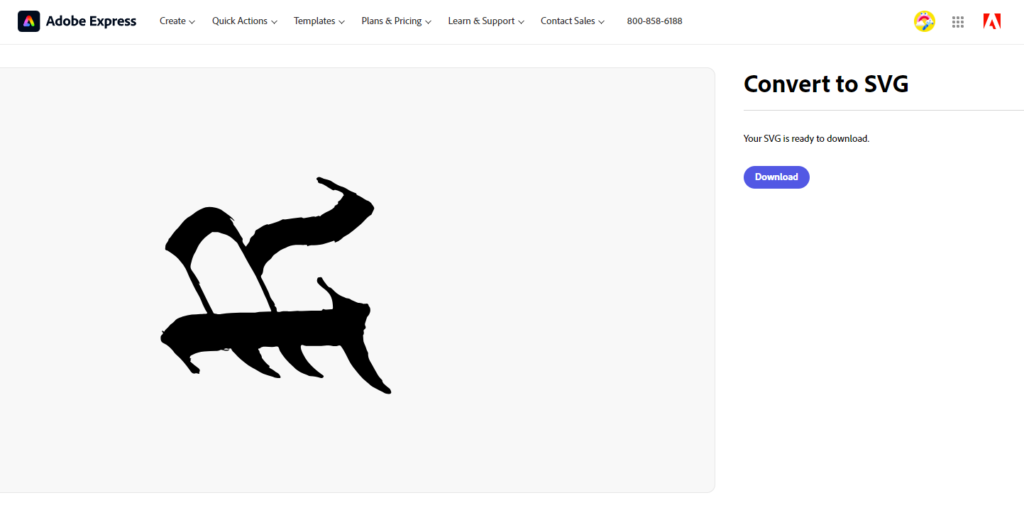
- Once it looks like the image on the right hit download and you’re good to go

Step 3: Let's Turn it into 3D
- On these steps, for extra help refer to the video to the left
- To begin to take this svg into 3D, what we will be doing is importing the image, saving it as a shape, and then deleting it from the plane
- Head to tinkercad and start a new design
- Once you are in the design, click to the right were it says basic shapes, in the list of options that appears click on your creations.
- Now above that area click the button which says “import”
- This will pull up a place for you to add your svg file, select it and it will appear
- If the file says it is too big, then shrink one of your pixel numbers, as seen in the video
- Now hit import and it should appear on the plane!
- Click on the object
- To the right click “create shape” and you should see a preview screen of your shape, give it a name and save it.
- Finally, once it is added as a shape, delete it from the plane, we won’t need it for a bit.
Step 4: Let's Build the Nametag
- To get started click back where it says your creations and from the options, select basic shapes
- Now drag a cylinder out to the center of the work plane, and tilt the camera so you are looking down at it from above
- Now pull the gray square at the corner out to scale the cylinder up to 50 x 50, now look at the cylinder from the side and pull the top gray square down so it has a height of 5 – see video for reference
- Pull a ring out now and set it down off the cylinder, and on the workplane
- Scale it up to 55×55, drag it over the cylinder and center it
- Look at the ring from the side and pull the bottom height down 3 and the top height down 2 so that the total height is 11
- Pull another cylinder out and place it up at the top of the workplane
- Pull the cylinder down into the top of the circle, as seen in the video, look at it from the side, and shrink the height down to 10
- Pull a cylindrical hole out onto the workplane again and shrink it down so that it fits inside the cylinder and drag it out into the cylinder
- Now that the two are together, click on one, hold shift and click the other, and then at the top of the screen hit group, now you should have the base of your nametag!
Step 5: Final Touches
- Now we just have to add our symbol and initials
- To begin, click back on basic shapes and select my creations
- Now drag your symbol out onto the empty part of the workplane, and scale it down so that it fits on the top of the nametag
- Now drag it out onto the nametag, if it needs to be rotated, click the shape, hold and drag the curvy arrow out to the left and drag until it is oriented correctly
- Now your shape is in place. All we have left to do is to add our initials
- Pan the camera to the underside of the tag
- Now click on your creations back to basic shapes
- Drag text out onto the underside of the tag
- Type your initials into the text and scale the initials down. If you need to rotate it do the same as you did for the symbol.
- Center your initials and you’re done!
